Country

  • Log in
  • Cart (0)
  • Checkout
  • Home
  • Catalogue 
    • All Products
    • Radionic Instruments 
      • 9 Dial Radionics Machine
      • Spooky2 Radionics
      • Peggotty Board
    • Radionic Accessories 
      • Stick Pad
      • Potentiser
      • XL Radionic Extension Plate
      • Extension Plate
  • Resources 
    • Spooky2 Radionics  
      • Spooky2 Radionics Manual
      • Spooky2 Software - Radionics
    • Radionics Stick Pad
    • Homeopathic Potentiser
    • Radionics Extension Plate
    • Peggotty Board Manual
    • 9 Dial Radionic Instrument Manual
  • FAQ
  • About 
    • Contact
    • Blog
    • Reviews
    • Search
  • Country

  • Home
  • Catalogue 
    • All Products
    • Radionic Instruments 
      • 9 Dial Radionics Machine
      • Spooky2 Radionics
      • Peggotty Board
    • Radionic Accessories 
      • Stick Pad
      • Potentiser
      • XL Radionic Extension Plate
      • Extension Plate
  • Resources 
    • Spooky2 Radionics  
      • Spooky2 Radionics Manual
      • Spooky2 Software - Radionics
    • Radionics Stick Pad
    • Homeopathic Potentiser
    • Radionics Extension Plate
    • Peggotty Board Manual
    • 9 Dial Radionic Instrument Manual
  • FAQ
  • About 
    • Contact
    • Blog
    • Reviews
    • Search
  • Country

Radionics Blog

Radionic Remedy Preparation

April 16, 2020

Radionic Remedy Preparation

In this post I will cover the process of Radionic Remedy Preparation for a water remedy using the method I have found most effective. Going into detail with water restructuring and the methods I am using to preserve the water remedy. This article is in addition to a video which is linked at the end of the post. 
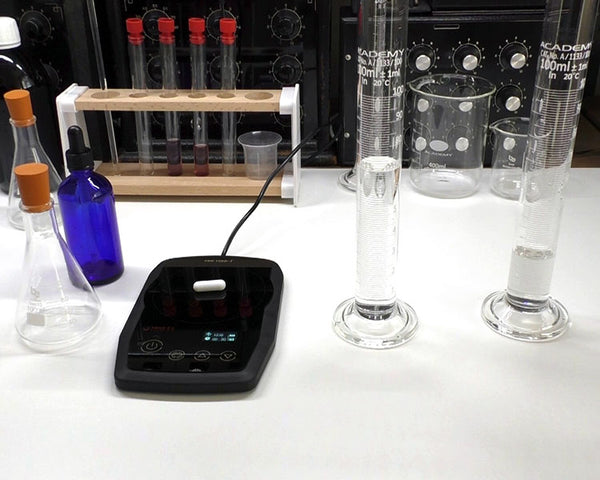
What you will need

Radionic Water Remedy Preparation

To begin the process you will require:
  • One Magnetic Stirrer and stir bar
  • Distilled Water 
  • Colloidal Silver 
  • Colloidal Gold (Optional)
  • One beaker or flask
  • One glass dropper bottle 

Preparation

Radionic Remedy Preparation Process

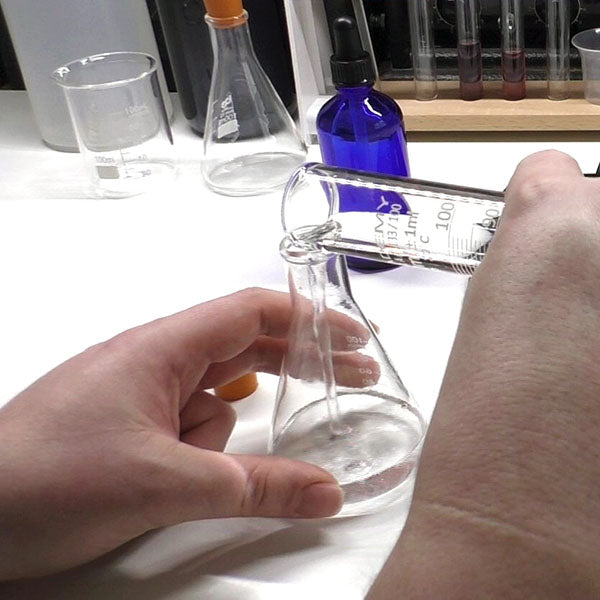
In this example we will use 70ml of food grade distilled water, 25ml of Colloidal silver and 5ml of Colloidal gold. This is to make 100ml total for our 100ml dropper bottle. You can easily adjust these volumes if you take them as a percentage, ie 70ml as 70% depending on the volume of remedy you are producing.

Take a 100ml flask or beaker and add  70ml of Distilled water, then add the 25ml of Colloidal silver and finally add the 5ml of colloidal gold which we use as a remedy fixative to the beaker or flask. All of these colloids are suspended in distilled water so we restructure them together.

Drop the stir bar into the flask or beaker and place it onto the magnetic stirrer, and run the stirrer for 20 minutes minimum. This will perform a basic water restructuring to erase any previous information from the water.

Storage

Once the stirrer has completed restructuring the water you can decant the contents of the beaker or flask into the dropper bottle taking care to retain the stir bar. Stopper the bottle and it is ready for imprinting, see the following blog post. (Substance copier) 

Once imprinted ideally keep refrigerated and use within 6 weeks. Remedies made with distilled water tend to form bacteria, this is mostly down to using non sterile glassware, and the direction of practitioners to place a drop of the remedy under the tongue, once the dropper is returned to the bottle bacteria from the mouth will flourish in the water. You can avoid this by simply adding a dropper full to a small beaker or medicinal measuring cup and take the water from that under the tongue, or just dropper into a glass of fresh water and drink it. We limit the growth of bacteria with colloidal silver as a preservative and by keeping refrigerated it will last a long time by following the advice outlined here.

For longer term storage you may transfer to ice cube trays to freeze, and treat each cube as a dose. Alternatively, wet sucrose or sac lac pillules with the water and allow to dry before storage.

For a more detailed step by step video of the radionic remedy preparation process, please watch the video here. 


Tweet Share Pin It Email

Also in Radionics Blog

Close-up of the Function Dial on the Berkana Labs 9 Dial Radionic Instrument, showing the Under Function (UF) and Over Function (OF) intensity scales for analysis and treatment.
Mastering the Function Dial: A Guide to Radionic Analysis and Intensity

April 30, 2026

Learn how to use the 9 Dial Instrument's function dial for precise radionic analysis. Master UF/OF polarity, compensatory rates, and intensity tuning for better balance.

Continue Reading

Price Increase
Price Increase

November 05, 2024

Unfortunately due to rising costs we now have to raise the price of the Spooky Radionics three dial

Continue Reading

Basic Radionic Copying

April 16, 2020

In this post I will take you through the process of a very basic radionic substance copying procedure into a simple water remedy, this is an ideal introduction for new users and only has a few steps.

Continue Reading

Shopping with us
  • Search
  • All Products
  • FAQ
  • Contact Us
  • Withdrawal
Sign up for our newsletter

Subscribe to our newsletter and always be the first to hear about what is happening

INFO

Shipping Policy

Privacy Policy

Terms & Conditions

Refund & Return Policy

Legal Notice


© 2026 Berkana Labs. Berkana Labs Ltd, 128 City Road, London, EC1V 2NX, United Kingdom, Registered in England, Company Registration Number: 11298944, VAT ID: GB 292582376 Powered by Shopify

American Express Apple Pay Diners Club Discover Google Pay Klarna Maestro Mastercard PayPal Shop Pay Union Pay USDC Visa